

Appen makes it easy to leverage the power of our contributors to carry out data transformations, cleansing, and analysis. Once you’ve loaded data to a job, either by uploading a file (.CSV, .TSV, .XLSX, .ODS) or pulling from a data feed (RSS, Atom, XML, JSON), you can manage it from the Data tab.
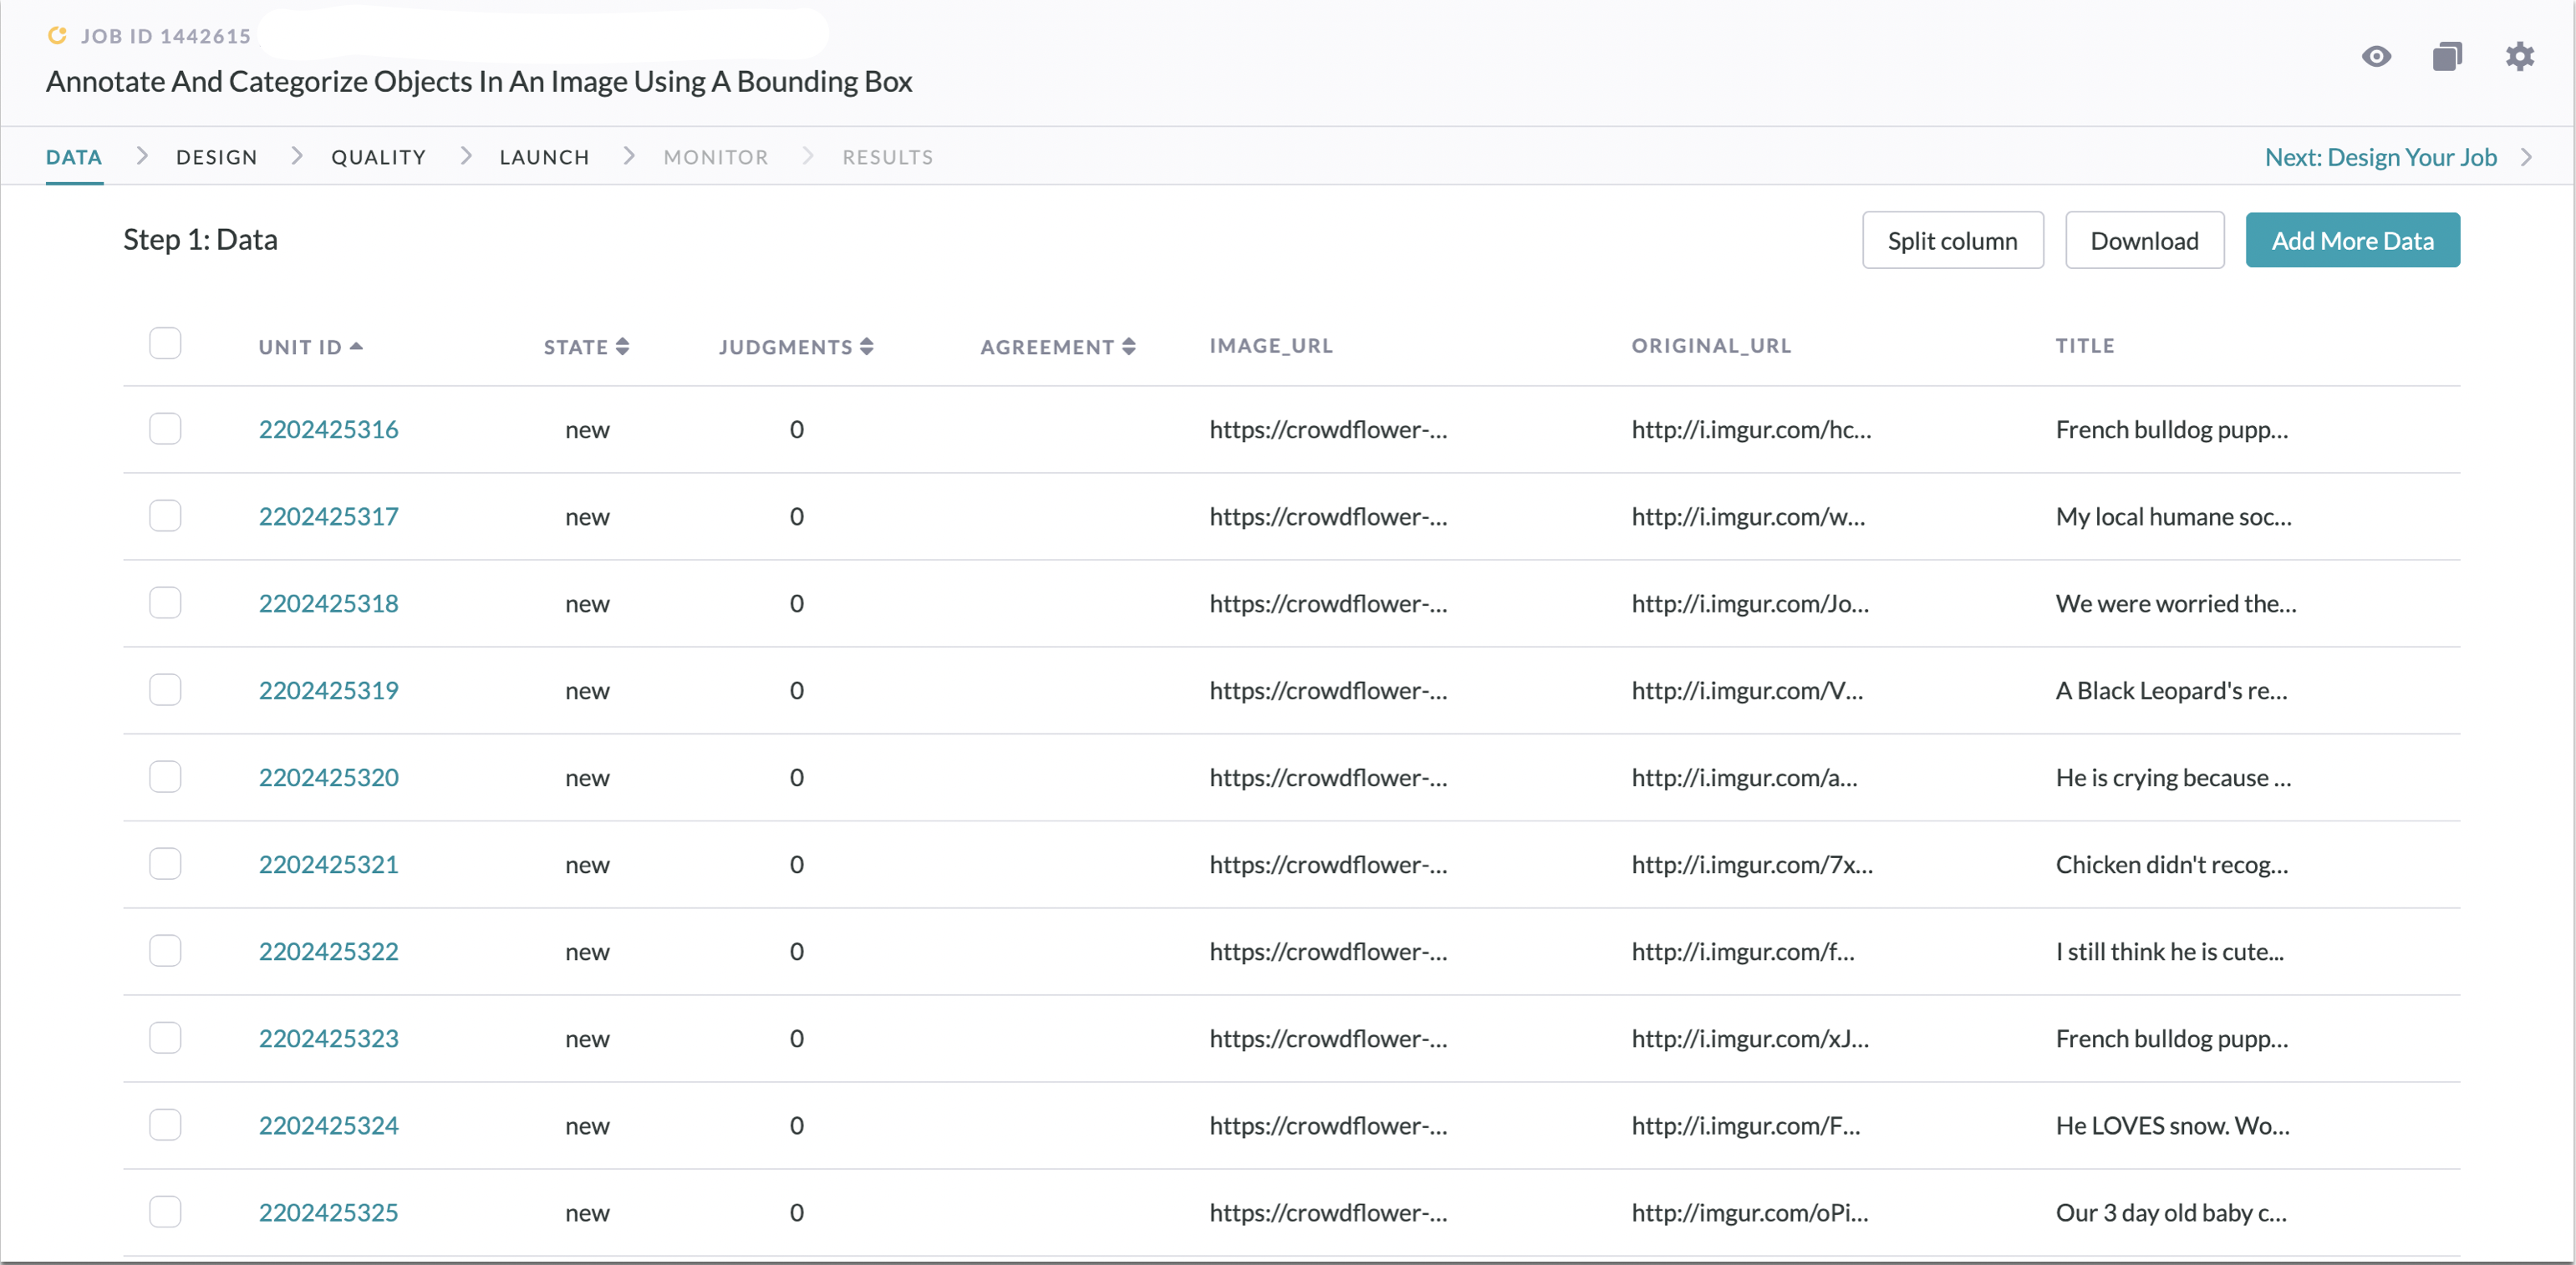
Fig. 1: Data page
Data Page Options
The Data Page options are as follows:
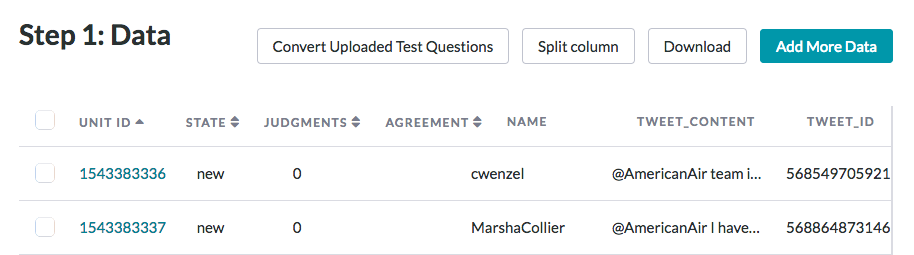
Fig. 2: Data Page options
Convert Uploaded Test Questions
The Convert Uploaded Test Questions option allows you to create test questions from a data file. This button will convert the units of your source data that have test question values into test question units automatically. This can save you time by uploading a source data file and a test question data file together, instead of separately.
Split Column
In cases where multiple values are stored in the cells of the same column, you can use the Split Column function to parse the data into two or more columns by specifying a delimiter (most typically a newline character).
Important note: Once a column is split by a specific delimiter, this action cannot be undone and the column cannot be split by a different delimiter.
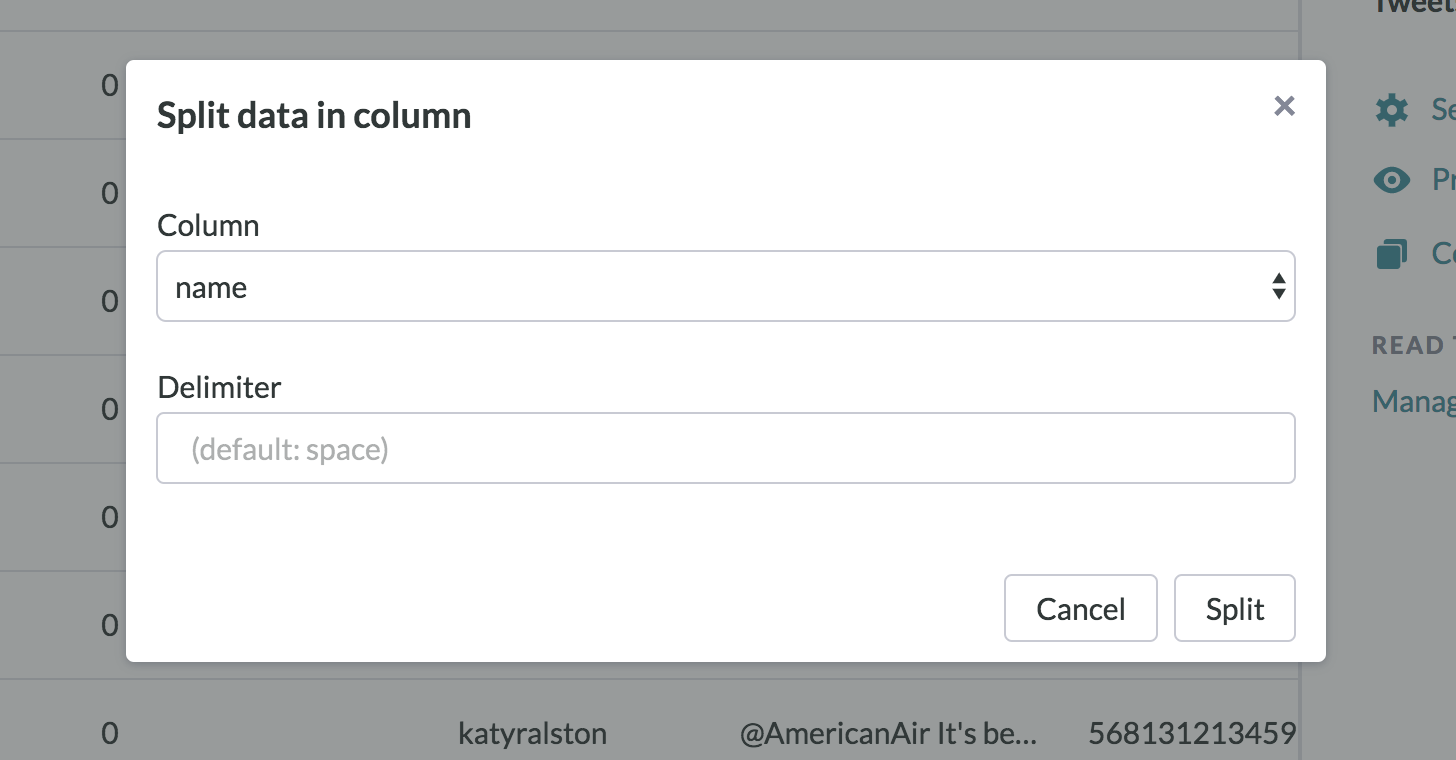
Fig. 3: Split Column modal in Data Page
Add More Data
Whether you’re uploading data to a job for the first time or supplementing the data you’ve already loaded, you can select Add More Data in the Data menu to add new data to your job.
Note: .CSV files are the preferred file type for data imports, though .TSV, .XLSX, and .ODS file formats are also supported. All data must be UTF-8 encoded.
Tip: Each column header serves as a unique identifier for the data it contains. Avoid duplicating column headers anywhere within the data of a given job unless you intend to supplement a given column with new data. In this case, it’s important that the column headers of your new data source are identical to the existing column headers.
Additional Columns
You’ll see a few additional columns prepended to the data that you’ve uploaded to your job. Each new column is explained below.
Unit ID
This column contains a unique ID for each row of data. This also links to that row’s unit page, which will contain contributor response statistics once your job has begun collecting judgments.
State
This column displays the status of each row. Here are the most common states that you’ll see:
-
New - this is the initial state that a unit is in, upon upload to the platform. Units in the New state are not yet eligible to receive judgments because they have not yet been launched.
-
Judgable - once a unit has been launched, it is eligible to receive judgments and is placed into the Judgable state, where it will remain until it has collected enough trusted judgments to satisfy the job’s requirements.
-
Golden - a Golden unit is a Test Question, which means that its judgments are used for quality control.
-
Finalized - when a unit has collected enough trusted judgments to satisfy the job’s requirements, it will move into the Finalized state. Once finalized, a unit will not collect any more judgments unless a contributor’s judgments become untrusted, necessitating the collection of additional judgments for all units to which that contributors has submitted responses.
Judgments
This column contains a tally of the total judgments collected for each unit. The tally includes both trusted and untrusted judgments.
Agreement
The agreement column displays a score between 0 and 1, inclusive, indicating contributor consensus across all questions that aggregate responses for that unit. For more information regarding this calculation, please see this Success Center article.
Working With Your Data
When you’ve finished adding your data, Appen displays 25 units on each page. Switch between pages using the controls at the bottom of the data page.

Fig. 4: Data Page Navigation
Sort units according to the values in a given column by clicking the column’s header to toggle between ascending and descending order.
Delete
If you would like to delete certain rows of data from your uploaded dataset, you may select the checkbox next to the data row and then select Delete from the Data Page bar. You may only delete units that are in a "New" unit state.